The Web Developers Guide to Easy HTML File Uploads
Uploading files is a fundamental feature for many web apps, from job boards to real estate websites. Whether you're dealing with images, documents, or other media types, a file uploader will enhance your user experience and website functionality. But it can be complicated to code and design your own file uploader. No worries, we can help.
This comprehensive guide will explain how to add HTML file uploads to your web app. We’ll also show you how to use Simple File Upload for easier file uploads.
What is an HTML file upload button?
HTML (Hypertext Markup Language) is the backbone of web development. It’s the standard markup language to create web pages and web apps. HTML provides us with the basic structure of web pages. We can then add styling to this basic structure with CSS (Cascading Style Sheets) and functionality with Javascript.
An HTML file upload button is a feature that allows users to upload files from their local system to a web server or cloud storage. A file upload button is vital for interactive websites where user-generated content is key.
Why do I need to add file uploads to my web app?
Adding file uploads to your web app is essential because it enables users to contribute their content directly to your app. This capability will increase your user engagement and expand the functionality of your web app. Check out our favorite file uploading use cases below.
Job boards. Let your users drag and drop cover letters and resumes to your job board.
Events. Do you want to collect photos from event attendees? Add file uploading to your web app and allow users to share their photos directly with you!
Real estate listings. Simplify the buying and selling process for your users. Let users upload real estate listing photos directly to your web app. It saves you and your users time!
Forms. Do you need to collect surveys or feedback from your users? Add a file upload option to your web app and start collecting the data you need from your users now.
How can I add HTML file uploads to my web app?
Follow the steps below to add an HTML file upload button to your app. Remember, you’ll need to use CSS to customize the appearance of your HTML file upload button and Javascript to add functionality.
Step 1: Create an HTML Input Element
Add an input element with the type 'file' in your code. This input type will insert a file upload button into your project.

Step 2: Customize your HTML File Upload Button
To customize the appearance of your file upload button, you’ll need to hide the default input.

Next, create a new button that your users can interact with. Feel free to change the text if you want your button to say something other than “Upload File.”

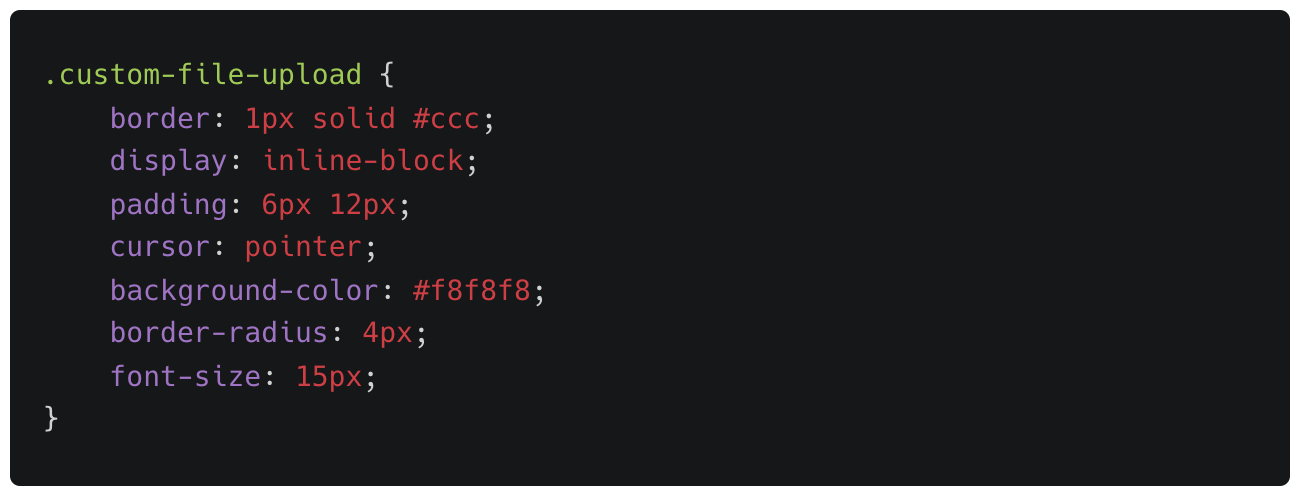
Now, add CSS to change the look and feel of your file upload button. Customize the button size, colors, or font size.
Step 3: Limit Accepted File Types
If you only want your users to upload specific image types or documents, you can limit the types of files that your file upload button will accept.
Add the ‘accept’ attribute to your input tag to specify the types of files you want your file upload button to accept.

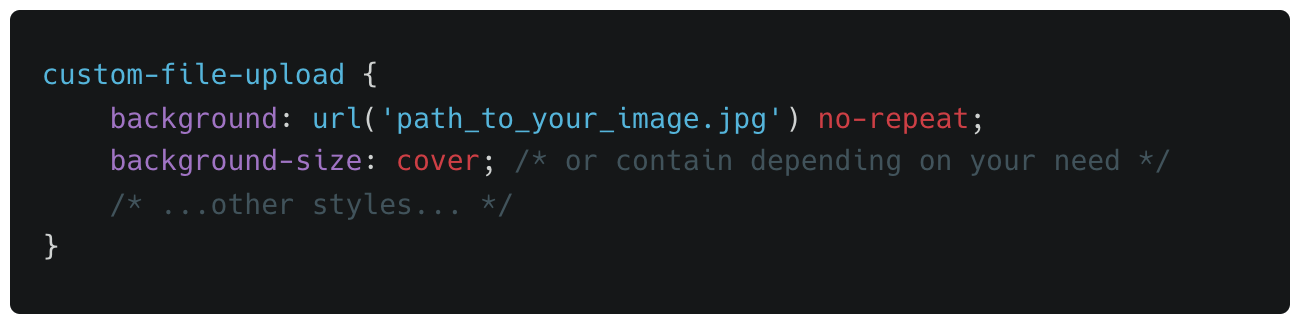
Step 4: Add an Image to Your HTML File Upload Button
If you want to add an image to the file upload button, you can use a combination of HTML and JavaScript to replace the default styling with a custom design. Remember to adjust the path to the image file according to your project structure.
Use Simple File Upload to Add a File Uploader to Your Web App (Even Faster than HTML File Uploads)
Simple File Upload is a robust, user-friendly tool that simplifies the process of adding a file uploader to your web app. Forget about the complexities of coding and cloud storage management; Simple File Upload handles everything for you.
Simple File Upload also includes:
Free cloud storage. We know how difficult cloud storage is to set up and manage, so we’ve done it for you. We store your files in redundant high-security, high-availability data centers. Files are also stored across two different service providers. You can be confident that your files are safe and secure with us.
Dependable, safe file delivery. Don’t let file uploading slow down your website and frustrate your users. Deliver files faster with our built-in, global CDN.
AI alt-tag generation. Automatically generate descriptive alt-text for every image your users upload. Our AI scans the image and creates meaningful, accessible alt-tags—no manual tagging required. Great for SEO and a must-have for accessibility compliance.
Background removal API. Instantly remove backgrounds from uploaded images with a single click. Perfect for profile pictures, product photos, and marketing assets. Your users get clean, professional images without needing to open Photoshop.
Keep reading to learn how to use our step-by-step file builder to add file uploading to your web app in four easy steps.
Step 1: Add the javascript snippet
<script type="module" src="https://cdn.simplefileupload.com/simple-file-upload.latest.js"></script>Log into your Simple File Upload account.
Click "Quick Start."
Step 2: Add the web component
Copy your custom web component
<simple-file-upload
  public-key="9e4f9a27ef16749c1ef8b3dad5720d1e"
></simple-file-upload>
Step 3: Listen for the javascript events and save the cdnUrl to your database
Listen for the fileUploaded javascript event, and save the returned cdnUrl to your database.
It's that easy!
In this article, we've explored the essentials of HTML file uploads and introduced Simple File Upload. Simple File Upload is a tool that lets you upload, store, transform, and deliver user files to your web app in less than 5 minutes. It can boost the functionality of of your web app and improve your user experience.
Are you ready to upgrade your app's file uploader? Try Simple File Upload for free!
Ready to simplify uploads?
Join thousands of developers who trust Simple File Upload for seamless integration.